Mockmill for KitchenAid: The Best Thing to Make Sliced Bread
The Mockmill – Grind Your Wheat at Home

I highly recommend the Mockmill for Kitchenaid as the best thing to make sliced bread. You see, I make at least one loaf of wholewheat bread every week (usually two, because most of one loaf is eaten while it is still hot), and the hardest part of that task is finding real, honest, wholewheat flour. That’s because real wholewheat flour is perishable, so you won’t find it on your grocer’s shelf. The stuff you see on the grocer’s shelf is white flour to which some of the wholewheat parts have been added back. But they have to leave out the essential oils that add flavor and vitamins, because the flour would go rancid at room temperature. So you have a couple of choices: order freshly ground flour from a specialty store found online (which is expensive), use the so-called wholewheat flour on the shelf (which is better than white flour, but really what’s the point?), or grind your own (which, thanks to Mockmill, is no longer a chore.)

You know, years ago people would carry bags full of grain to the local mill to be ground into flour, usually by heavy stones powered by water wheels or mules. The miller was one of the most important persons in town, because he literally helped you make your daily bread. Maybe that’s why there are so many people with the last name “Miller”. Well we don’t have a miller here and I don’t really want to keep a mule around to grind flour, so I have had to resort to using an old Vitamix blender to make fresh flour. It works okay, but is very noisy and time-consuming and produces a flour that is not as fine as I would like. I tried a hand-cranked grain mill, but it was very cumbersome and was just not worth the trouble. I was considering purchasing a dedicated grain mill, but was put off by the cost. So along comes the Mockmill–simple, convenient and fast.
If you own a KitchenAid stand mixer, this is the tool for you. So, yes, I was excited when the Mockmill arrived on my doorstep. I opened it immediately and put it through its paces. I briefly glanced at the instruction manual, but you don’t really need it. I was happy to see that the grinder was actually made of metal and was small enough to fit on the pantry shelf. I attached it to the KitchenAid hub with ease and was ready to go. It is available in white, which doesn’t match my KitchenAid, but who cares?
The Mockmill contains actual stones, which do the grinding. It can be used for any DRY, clean grains and DRY spices. Because it uses real stones, you cannot mill any oily seeds or nuts (including coffee beans) that will clog the stones. So if you have heard of an oil made with the seed, such as peanut oil, sesame oil, walnut oil, etc., or it squashes into an oat flake shape instead of cracking strongly when pressed on a hard surface DO NOT grind it in this mill. So I tried it on a few spices that I had always ground with limited success using a mortar and pestle, such as coriander, cumin, and fennel (which just flies all over the kitchen when ground in a mortar). This was way too easy for this grinder.

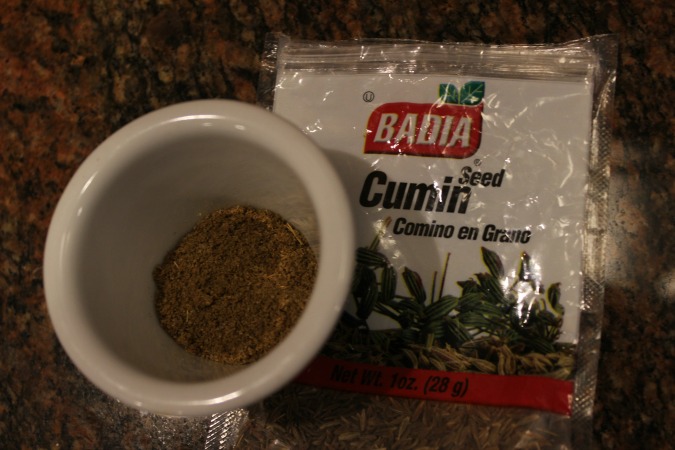

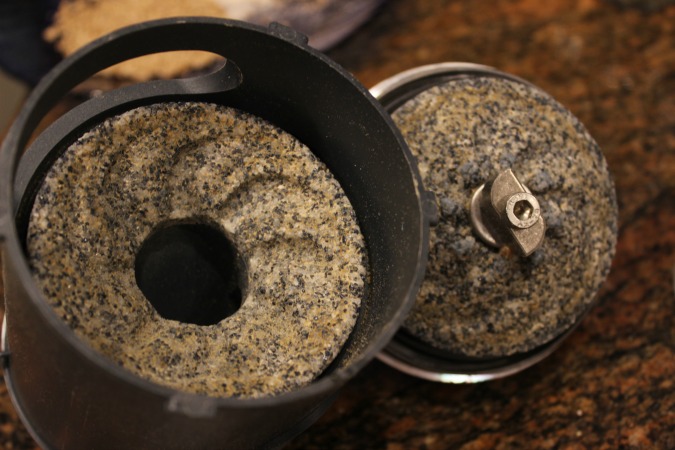
It’s amazing how much better freshly ground spices smell and taste. You do need to run some dry rice or grain through the mill to remove the residual odor from the stones. I found this a particular problem with cumin, because it has such a strong aroma. I recommend that you do not grind cumin because of this. In fact, I had to disassemble the mill to clean the cumin off of the stones. But that was surprisingly fast and easy. And it cannot be reassembled incorrectly because of the notches and tabs on the parts. When I opened it I found two spiral grooved real stones.
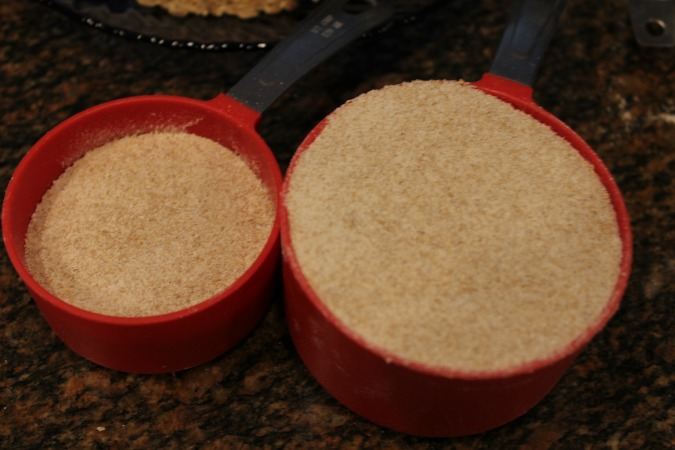
Well, I really wanted to talk about flour, but it’s good to know I can have freshly ground spices, too. Flour is easy. Add the wheat to the hopper, set the coarseness as you desire, which for me is the finest setting, turn your KitchenAid to the 9 or 10 speed and that’s it. The attached trough dumps the flour right into the mixing bowl. I found that one cup of wheat made about 1-1/3 cup of flour and that took about two minutes.

So let’s make a loaf of bread. I have used and refined this recipe for years. It produces a hearty, loaf with a nice crust and nice body, and melts in your mouth fresh out of the oven with a smear of butter (never margarine) and a bit of clover honey. When stored in a sealed bag it keeps for at least a week, but I don’t really know how long it will last because there is never any left to save. This recipe takes about 15 minutes to go from kernels of wheat to kneading dough. With rising and baking it’s about a three hour process, so don’t start this while you’re watching the Tonight Show unless you don’t plan on going to bed until 4 in the morning.
IMPORTANT POINT: WEIGH THE INGREDIENTS. It is much faster and much more accurate. Flours differ by moisture content and coarseness. The only way to know how much to add is by weight. I have developed this recipe using red winter wheat. Keep careful track of how much flour you use each time to develop a recipe that is perfect for the wheat you are using.
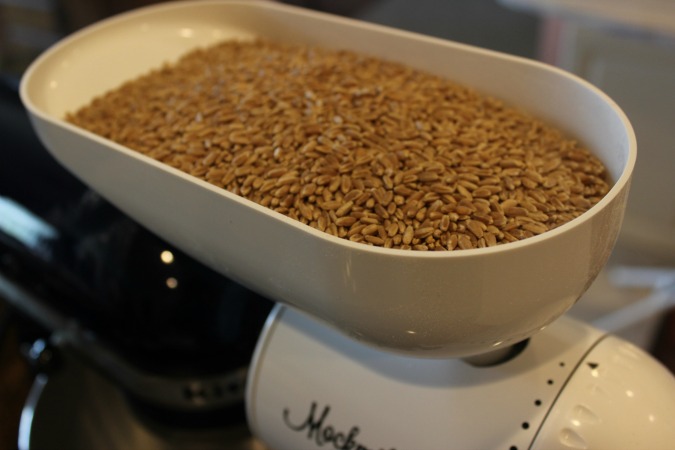
The hopper conveniently holds enough wheat for one loaf of bread.
- Place empty large KitchenAid bowl on scale and tare to zero.
- Place 515 grams of wheat in bowl and then transfer to the Mockmill hopper.
- Grind at finest setting into the bowl. This will take about 10 minutes.
- Remove Mockmill from your KitchenAid.
- Remove bowl from mixer and weigh. Remove excess flour so that final weight is 508 grams.
- Tare bowl to zero and add 281 grams of hot water.
- Tare bowl to zero and add 104 grams of honey.
- Tare bowl to zero and add 51 grams of butter cut in small pieces or melted.
- Tare bowl to zero and add 10.5 grams of salt.
- Return bowl to KitchenAid and stir with dough hook for a few seconds to distribute ingredients so heat or salt concentrations will not damage yeast.
- Add 1 tablespoon dry active yeast (not fast acting or rapid rising).
- Continue kneading with dough hook on lowest speed for about 15 minutes. The dough is ready when it is very elastic and smooth. While you are developing your recipe, you may find that you need to add water a tablespoon at a time if the dough is too dry or flour a bit a time if the dough is too sticky after it has kneaded.
- Remove dough from hook and round into ball. Cover with a thin film of vegetable oil (about a teaspoonful) on all sides to prevent drying while rising and return to bowl. Cover bowl with a damp tea towel and place in a warm oven (about 100 degrees).
- Allow dough to rise about 1-1/2 hours until doubled.
- Knead dough into loaf shape and place in buttered loaf pan. Cover with damp tea towel and return to warm oven to rise again.
- Allow to rise about 45 minutes to an hour until risen about two to three inches above top of pan and remove tea towel.
- Leave bread in center of over and set to 375 degrees.
- Bake for 40 minutes.
- Remove from oven and immediately remove from pan and place on cooling rack. Smear butter over all surfaces of loaf.
- Allow to cool completely before slicing. (I have actually never done that–who does?) But you to need to wait until it is cool before placing in plastic bag to prevent moisture from causing soggy bread.

Wholewheat Bread Ready to Eat In addition to the bread, I found the Mockmill to great for making cracked wheat for cereal. This is a snap. Add a cup of kernels to the hopper and grind at coarsest setting. Done. Less than one minute. That’s it. To make a great cracked wheat cereal add one part cracked wheat to four parts water in a saucepan. I used one cup wheat plus four cups of water. Bring to boil and simmer, stirring often for about 30 minutes until thickened. I added about a half-teaspoonful of salt, but you can adjust however to like. This was delicious with a little cream, cinnamon, and sliced banana. It was not necessary to add any sugar. This has replaced my usual oatmeal in the morning and I find that it sticks with me much longer than the oatmeal did. It’s not as fast to cook as oatmeal, but I just cook up a batch to last a week, refrigerate it and parcel it out for breakfast each morning.
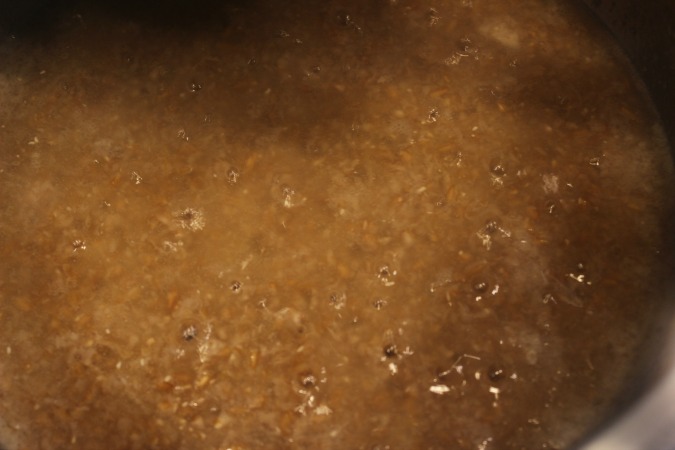
Cracked Wheat Simmering

Mockmill from Marion Schramm on Vimeo.
About Mockmill
Our mission is to enable our customers to get the most out of life, beginning with the way the body is nourished. In particular, we believe everyone should enjoy the exceptional taste and health benefits of freshly milled flour. To that end, our pioneering founder Wolfgang Mock revived his dormant company in 2014 to launch the Mockmill, an affordable grain milling attachment that fits a wide variety of stand mixers. Mockmill makes fresh flour right when you need it, exactly as needed.
From our historical farm complex at the foot of the volcanic Otzberg, near Frankfurt and on the edge of the scenic Odenwald, we are hard at work bringing products that enhance health and happiness to the world. Our close connection to nature and the sustainable production of fresh food is reflected, too, in our products and programs. And our USA subsidiary, Wolfgang Mock, Inc., was founded in May, 2016 to put us into direct contact with our American customers. So get to know our products today. And discover the joys of becoming a miller.
My only complaint is that it was little difficult to remove from the KitchenAid hub. I found I had to wiggle it back and forth to get it to release, but maybe this is typical of KitchenAid attachments or maybe only a problem with my mixer.
Bottom line: Get a Mockmill for KitchenAid. You will love it.
Connect With Mockmill: Shop | Facebook
Disclaimer:
Beautiful Touches received this product from the Company for review purposes only. All thoughts and words in this post is my own and I was not paid to endorse it. I am only voicing my opinion about this product.


I have never seen one of these, I will have to put it on my wish list for Christmas. I love to make my own bread!
This is going on my Birthday list. i love the idea and love my KitchenAid Mixer.
Your bread and cereal looks so good. Someday I am going to invest in a kitchenaid mixer and mockmill grinder so I can make my own fresh bread and other things.
Never heard of Mockmill but KitcnAid has been around for a while. We love bread of all kinds but go through sliced bread because of packing lunches. This sounds like a great product to have.
This is a great product for those of us who love to really nutritious bread!
Nothing beats home made bread. This sounds so much healthier. I would love to have this. It is a great price. Thank you for sharing
That would be a great addition to a kitchen that has a Kitchenaid, which mine does not have.
O this would be so totally helpful when making gluten free flours.
I just have to get me one.
I think I need this for my Kitchenaid Mixer. I love bread.
I have never seen or heard of one of these before. I like the look of it and will have to maybe look into one of these.
Oh this is a fantastic product! I did not even know about it- thank you for the information!
Theres so many things a kitchen aid mixer can do, I’ve been wanting the grinder attachment so I can make sandwich spread
I would love to have one of this
I’ve never heard of this product but it sounds great. Sorry I missed the amazing special that ended yesterday.
i’m saving up for one of these!